yolov5+csl旋转目标检测代码解析2
本篇主要记录学习yolov5+csl旋转目标检测的原理,主要是探究代码中如何得到theta/gauss_theta的target。参考知乎 略略略 https://zhuanlan.zhihu.com/p/358441134; yangxue https://zhuanlan.zhihu.com/p/111493759
一、debug记录
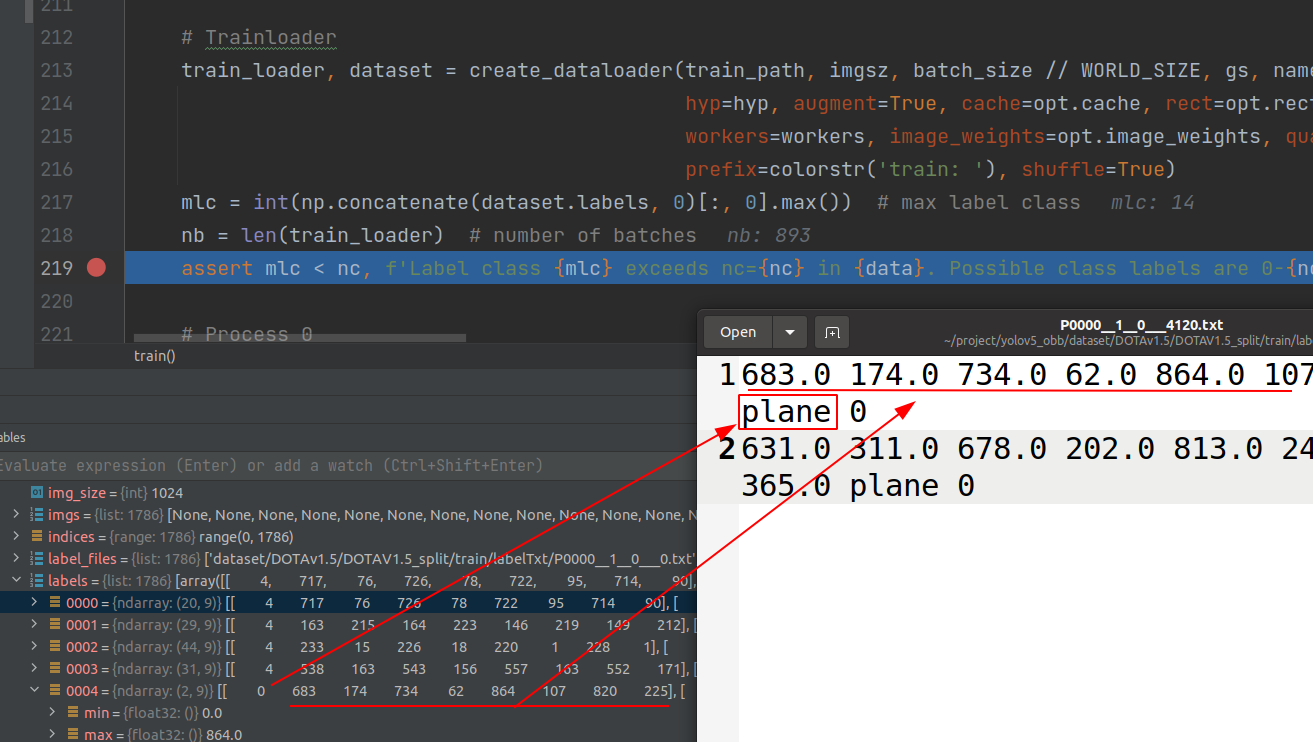
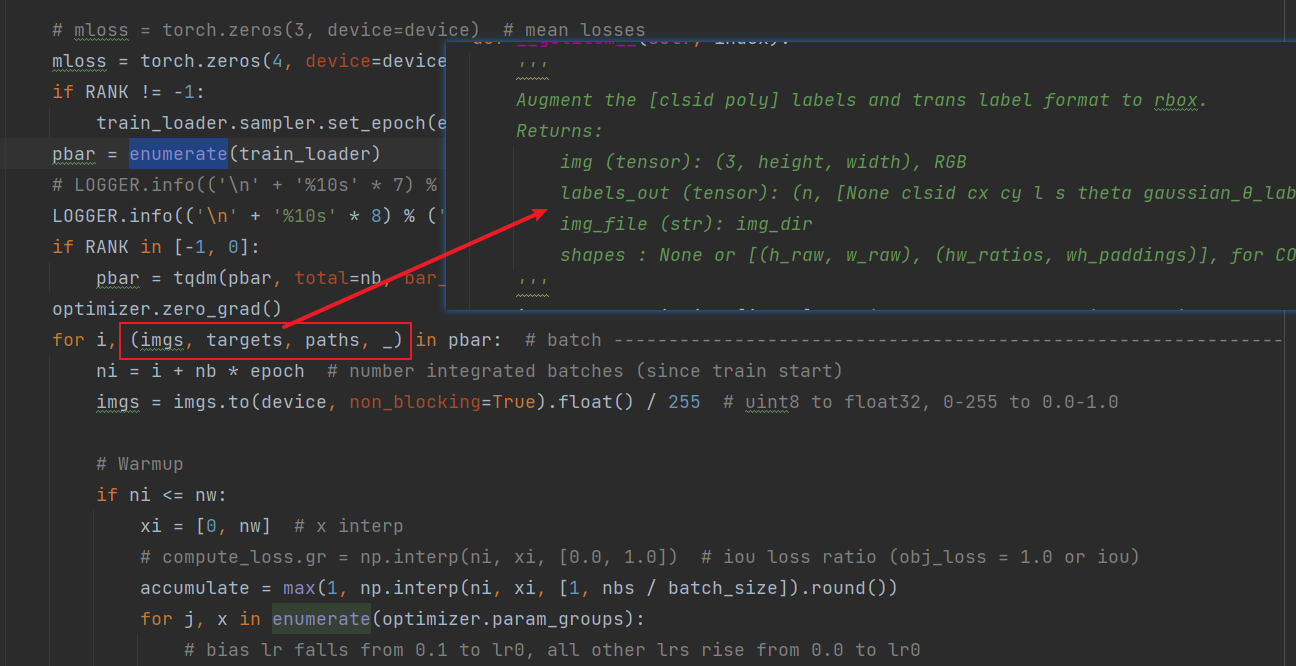
经过dataloader之后的数据格式如图,cls已经转化为id。此时仍是原本的表示方法。
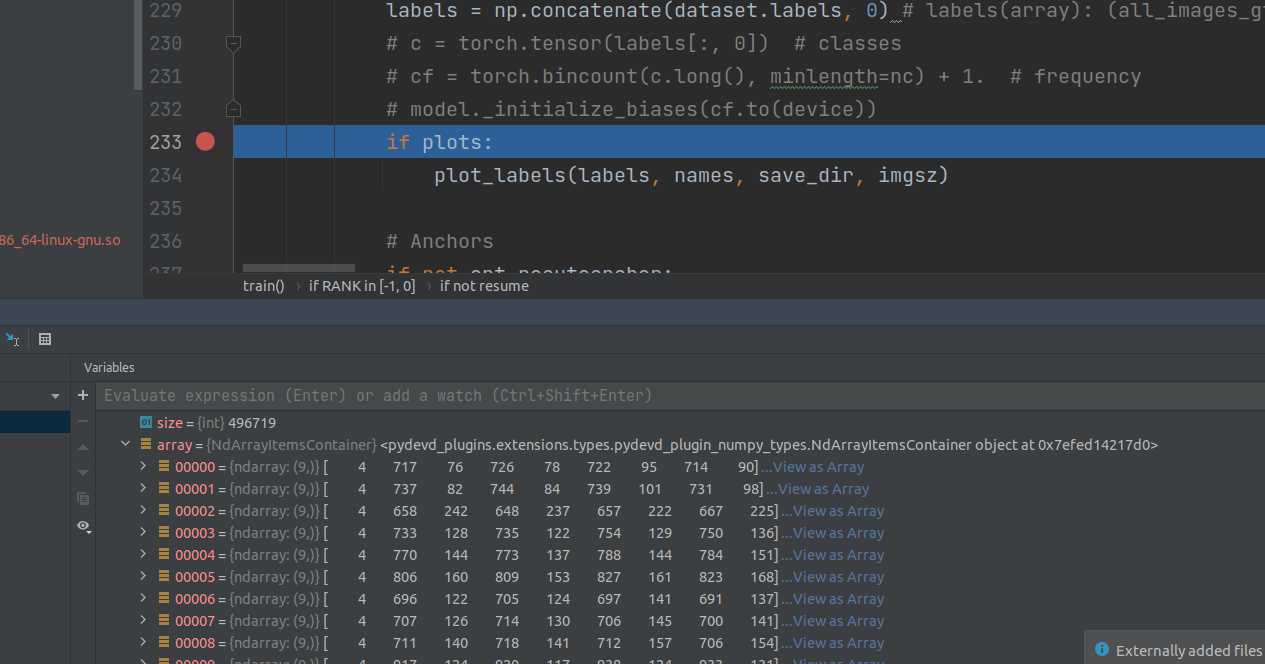
在plot_labels里面会有完整的标签格式转换以及高斯窗的csl方法,但是这个函数并没有返回
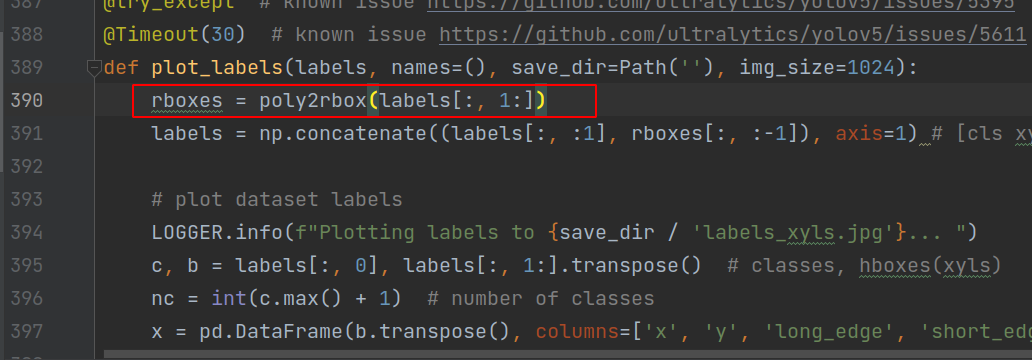
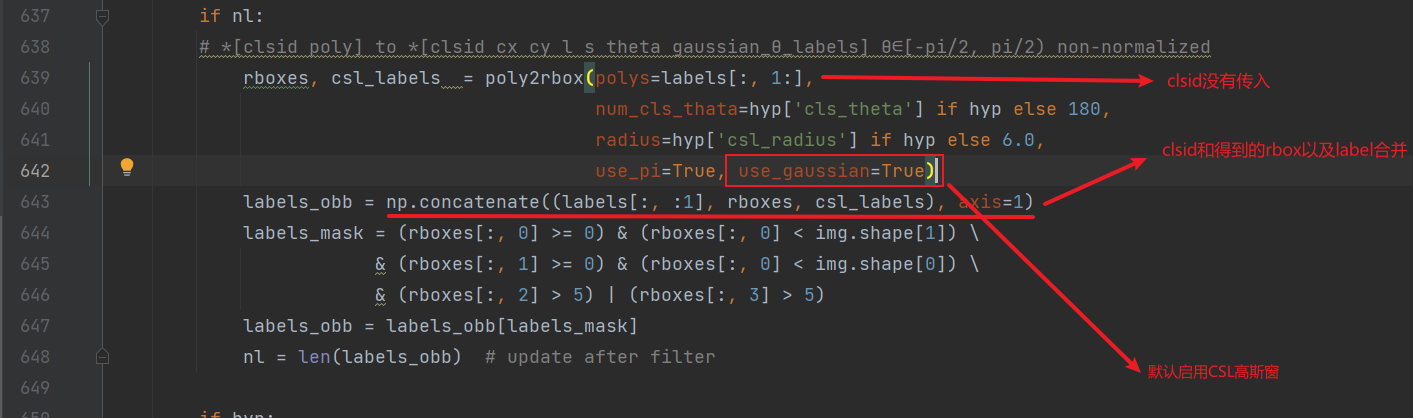
即最后一个参数为True时,使用csl,并且采用高斯窗函数,csl部分代码是直接从yangxue大佬那里拿来用的。
def poly2rbox(polys, num_cls_thata=180, radius=6.0, use_pi=False, use_gaussian=False):
    """
    Trans poly format to rbox format.
    Args:
        polys (array): (num_gts, [x1 y1 x2 y2 x3 y3 x4 y4])
        num_cls_thata (int): [1], theta class num
        radius (float32): [1], window radius for Circular Smooth Label
        use_pi (bool): True θ∈[-pi/2, pi/2) , False θ∈[0, 180)

    Returns:
        use_gaussian True:
            rboxes (array):
            csl_labels (array): (num_gts, num_cls_thata)
        elif
            rboxes (array): (num_gts, [cx cy l s θ])
    """
数据处理(转换标签格式,生成theta参数等操作),在LoadImagesAndLabels类中重写了getitem方法。
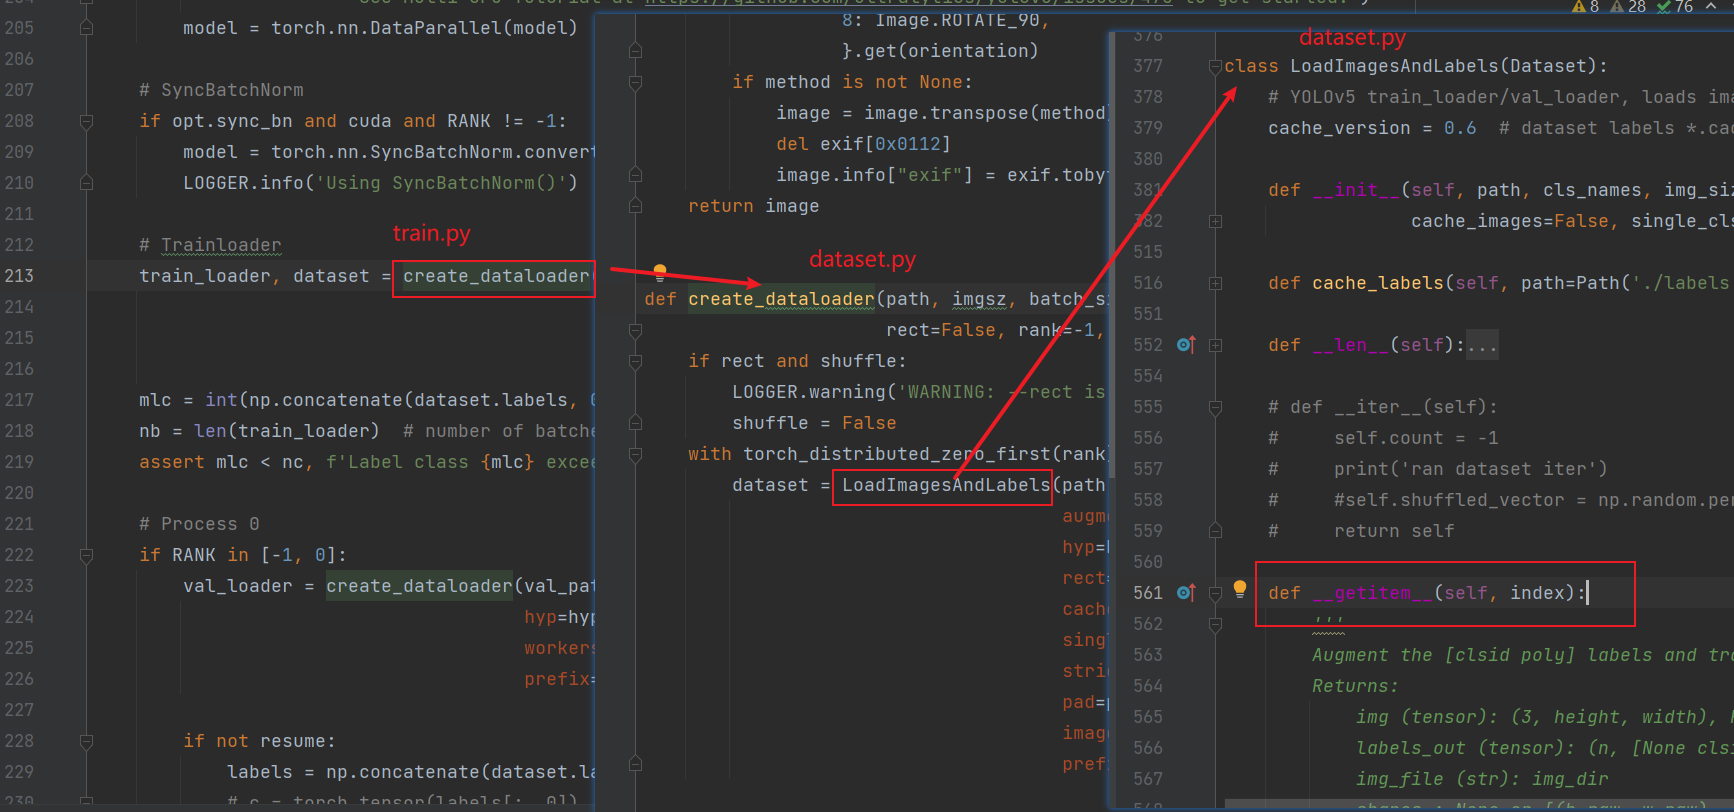
可以看到,取数据的格式和getitem的返回值一致。
在该方法中,默认启用了csl高斯窗,clsid不上传,在得到bbox之后合并。
下面我把poly2rbox单独拎出来分析:
import numpy as np
import torch
pi = 3.141592
import cv2
def gaussian_label_cpu(label, num_class, u=0, sig=4.0):
"""
转换成CSL Labels:
用高斯窗口函数根据角度θ的周期性赋予gt labels同样的周期性,使得损失函数在计算边界处时可以做到“差值很大但loss很小”;
并且使得其labels具有环形特征,能够反映各个θ之间的角度距离
Args:
label (float32):[1], theta class
num_theta_class (int): [1], theta class num
u (float32):[1], μ in gaussian function
sig (float32):[1], σ in gaussian function, which is window radius for Circular Smooth Label
Returns:
csl_label (array): [num_theta_class], gaussian function smooth label
"""
x = np.arange(-num_class/2, num_class/2)
y_sig = np.exp(-(x - u) ** 2 / (2 * sig ** 2))
index = int(num_class/2 - label)
return np.concatenate([y_sig[index:],
y_sig[:index]], axis=0)
def regular_theta(theta, mode='180', start=-pi/2):
"""
limit theta ∈ [-pi/2, pi/2)
"""
assert mode in ['360', '180']
cycle = 2 * pi if mode == '360' else pi
theta = theta - start
theta = theta % cycle
return theta + start
def poly2rbox(polys, num_cls_thata=180, radius=6.0, use_pi=False, use_gaussian=False):
"""
Trans poly format to rbox format.
Args:
polys (array): (num_gts, [x1 y1 x2 y2 x3 y3 x4 y4])
num_cls_thata (int): [1], theta class num
radius (float32): [1], window radius for Circular Smooth Label
use_pi (bool): True θ∈[-pi/2, pi/2) , False θ∈[0, 180)
Returns:
use_gaussian True:
rboxes (array):
csl_labels (array): (num_gts, num_cls_thata)
elif
rboxes (array): (num_gts, [cx cy l s θ])
"""
assert polys.shape[-1] == 8
if use_gaussian:
csl_labels = []
rboxes = []
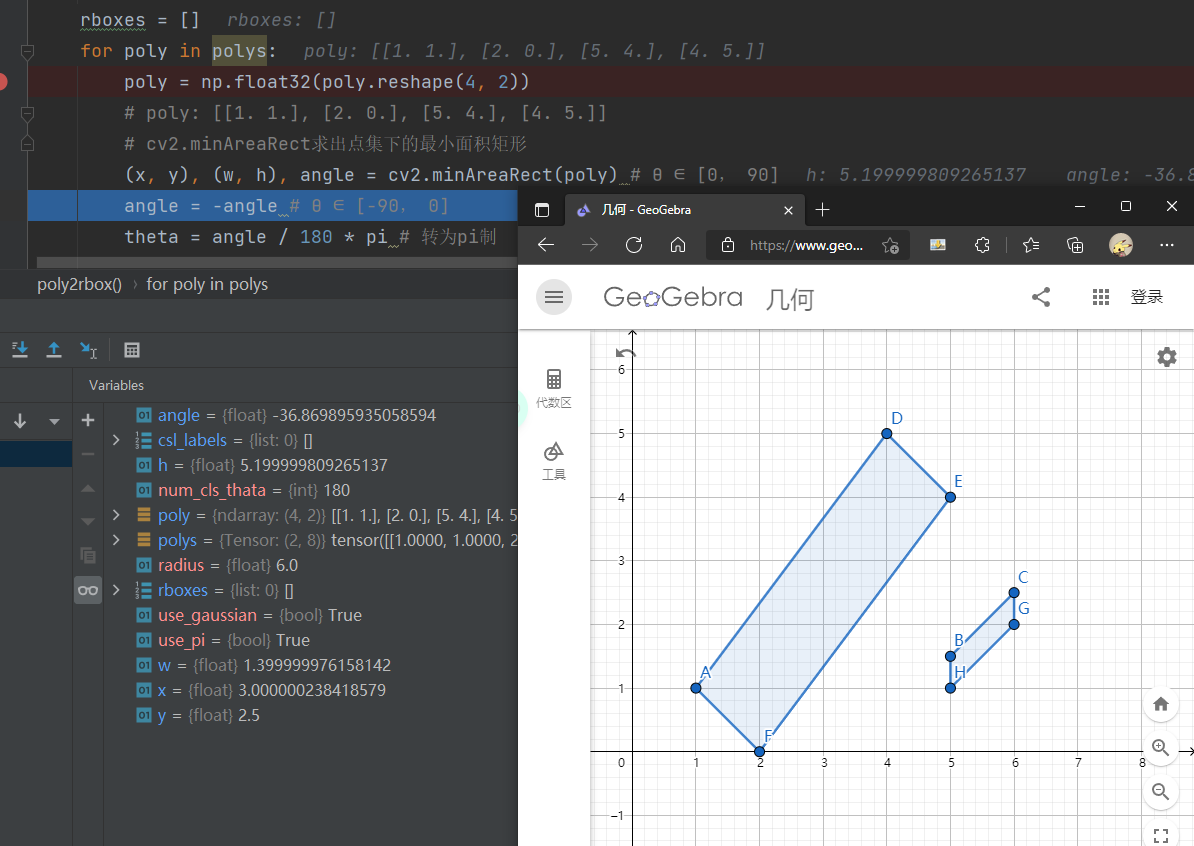
for poly in polys:
poly = np.float32(poly.reshape(4, 2))
# poly: [[1. 1.], [2. 0.], [5. 4.], [4. 5.]]
# cv2.minAreaRect求出点集下的最小面积矩形
(x, y), (w, h), angle = cv2.minAreaRect(poly) # θ ∈ [0, 90]
angle = -angle # θ ∈ [-90, 0]
theta = angle / 180 * pi # 转为pi制
# trans opencv format to longedge format θ ∈ [-pi/2, pi/2]
if w != max(w, h):
w, h = h, w
theta += pi/2
theta = regular_theta(theta) # limit theta ∈ [-pi/2, pi/2)
angle = (theta * 180 / pi) + 90 # θ ∈ [0, 180)
if not use_pi: # 采用angle弧度制 θ ∈ [0, 180)
rboxes.append([x, y, w, h, angle])
else: # 采用pi制
rboxes.append([x, y, w, h, theta])
if use_gaussian:
csl_label = gaussian_label_cpu(label=angle, num_class=num_cls_thata, u=0, sig=radius)
csl_labels.append(csl_label)
if use_gaussian:
return np.array(rboxes), np.array(csl_labels)
return np.array(rboxes)
def main():
ploys = torch.tensor([[1, 1, 2, 0, 5, 4, 4, 5],
[5, 1, 6, 2, 6, 2.5, 5, 1.5]])
rboxes, csl_labels = poly2rbox(polys=ploys,
num_cls_thata=180,
radius=6.0,
use_pi=True, use_gaussian=True)
print('rboxes: ', rboxes)
print('csl_labels: ', csl_labels)
if __name__ == "__main__":
main()
这是debug记录,比较奇怪的是x,y,w,h的计算似乎cv2的api有点问题,比如我给的例子,角度计算的没问题,但是很明显一个3,4,5的三角形,结果h=5.199999;短边1:1:1.414(根号2),结果算出来是w=1.39。虽然差距不大,本身api的调用确实可能比较复杂(可以实现求点集下最小面积矩形)。当然实际情况是标注的label可能不一定是完美的矩形,用当作矩形的方法似乎也有不妥。但是这对loss的求解和反向传播肯定是有影响的。至此target部分的数据,csl的角度怎么得到的都已经清楚,将在下一篇博客里面探究。pred是如何得到的。另外,这个demo中csl_labels: (2, 180)
一、api记录
1.tqdm(进度条美观)
from tqdm import tqdm
import time

iterator = tqdm(iterable=range(100),
                # iterable:tdqm数据参数支持的数据类型是可迭代的对象iterable,
                # 在Python中默认的可迭代对象有:list、str、tuple、dict、file、range等
				desc='test_tqdm',
                # str类型,作为进度条说明,在进度条左边
				total=100,
                # 预取的迭代次数
				leave=True,
                # 循环结束后是否保留进度提示信息,默认保留
				ncols=100,
                # 进度条长度,150比较适合
				mininterval=0.1,
                # 进度条最小的更新间隔(秒)
				maxinterval=10.0,
                # 进度条最大的更新间隔(秒)
				unit='it',
                # 单位,默认it每秒迭代数
				bar_format=None,
				# bar_format='{l_bar}{bar:10}{r_bar}{bar:-10b}',
                # 在进度条右边添加字典类型描述信息
				position=None,
                # 指定偏移,这个功能在多个进度条中有用
				postfix=None
                # 自定义进度条
                )
for i in iterator:
    time.sleep(0.3)
结果如下:

2.python专有函数
没有python的基础,所以有些基础知识也是边实践边学(轻喷/-_-\),类似**init函数等的python的专有函数,是在创建一个类对象之后一定会调用的方法,类似于构造函数。同时也可被重载(项目中的get_item**就是重载了专有函数),下面是一个简单的例子。
class Cat:
    def __init__(self, color):
        self.color = color

    def eat(self):
        print("--eating food--")

    def printinfo(self):
        print(self.color)


# 实例化Cat对象
mimi = Cat("white")
# 如果创建实例的时候没有给color,此句会报错
mimi.printinfo()
mimi.eat()
# 重新给类成员赋值
mimi.color = "black"
mimi.printinfo()
输出如下:
white
--eating food--
black
与此类似的,两个下划线开头(__private_method),声明该方法为私有方法,只能在类的内部调用 ,不能在类的外部调用。