TVM编译模型(tf的例子解读)
本篇主要记录一下TVM编译一个使用tf框架模型的例子,FPGA开发板:zcu102
一、流程记录
需要注意的是,显然(我就不知道) https://tvm.apache.org/docs/how_to/deploy/vitis_ai.html TVM官方这里给的流程,不是完整脚本,只是一个介绍,完整Py脚本可以在编译模型的相关网页最下面下载得到。
过程跟着 https://github.com/Xilinx/Vitis-AI/blob/1.4/external/tvm/docs/compiling_a_model.md 这个走。
- 运行容器镜像:./docker_run.sh tvm.ci_vai_1x
- 进入tf虚拟环境
- 进入example文件夹
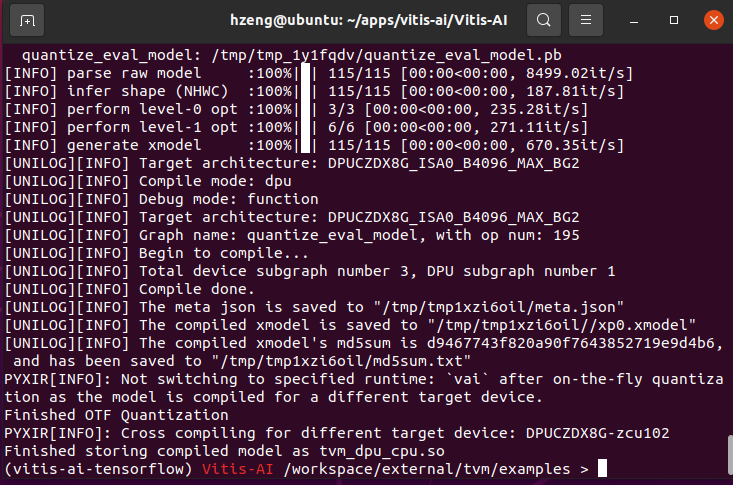
- 编译生成对应目标的文件 python3 compile_mxnet_resnet_18.py “DPUCZDX8G-zcu102”
最后一个参数指DPU target ID 参照: https://github.com/Xilinx/Vitis-AI/blob/1.4/external/tvm/README.md#dpu-targets
然后就生成一个如图的 .so 文件,在FPGA上调用。
二、编译脚本解析
显然,自己的网络部署不能用同样的脚本,因此对官方的编译脚本作分析,以实现客制化部署自己的网络。下面是具体的分析(代码段部分是完整的compile_mxnet_resnet_18.py,注释部分是自加的),也是本文重点。
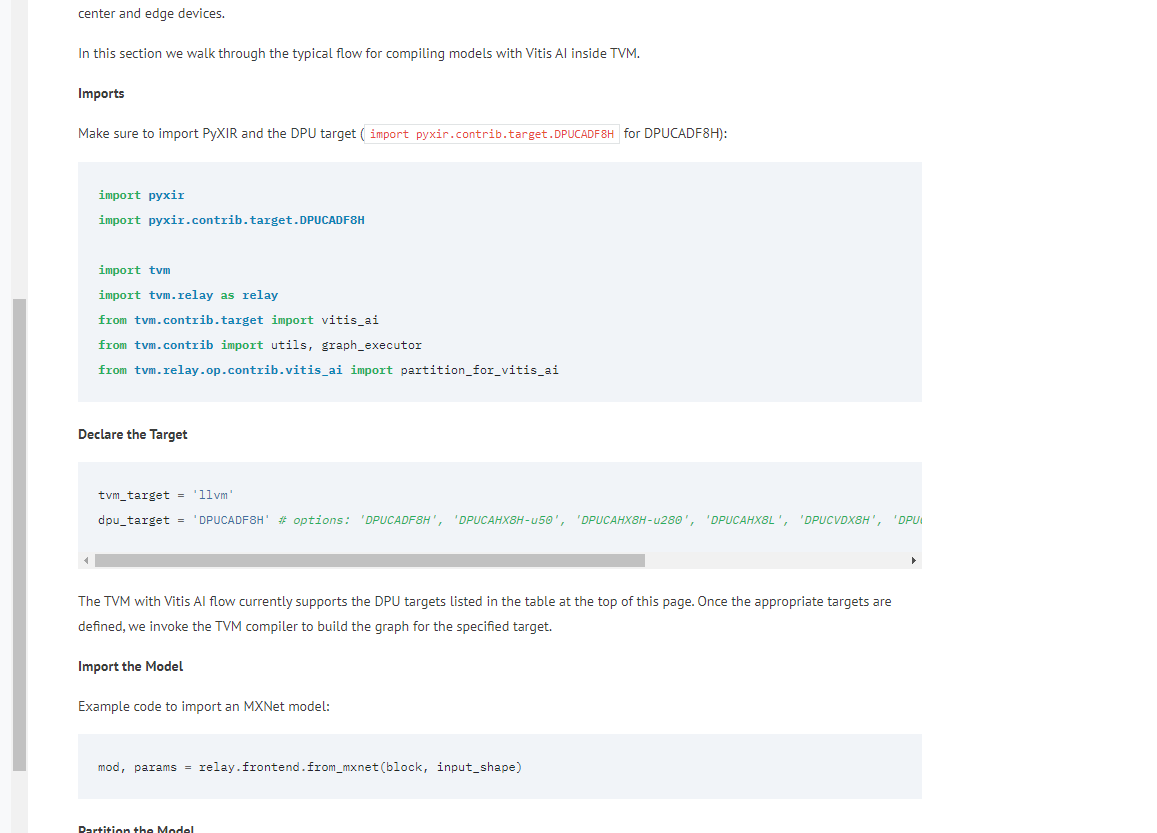
1. imports
需要注意的是,脚本中导入pyxir等模块并未直接使用(在该脚本代码中体现),但是相关模块的导入以及DPU目标的声明仍是不可或缺的,否则在执行时会出错。
import os
import sys
import numpy as np
import cv2
import time
from typing import List
from pathlib import Path

# pyxir是tvm和vitis-ai集成的接口,但是这个脚本中似乎只是引入,没有使用该模块?
# 然而教程中特意强调了必须引入该模块
# pycharm中显示为灰色,建议尝试注释后是否能够正确生成.so文件
# 不能,必须加,注释掉会其实缺少文件
import pyxir
# 这句同理也是灰色
import pyxir.contrib.target.DPUCADF8H

import logging

import tvm
from tvm import contrib
import tvm.relay as relay
from tvm.relay import transform
from tvm.contrib import utils, graph_executor as graph_runtime
# 这句也是灰色
from tvm.contrib.target import vitis_ai
from tvm.relay.build_module import bind_params_by_name
from tvm.relay.op.contrib.vitis_ai import partition_for_vitis_ai
2. 添加路径
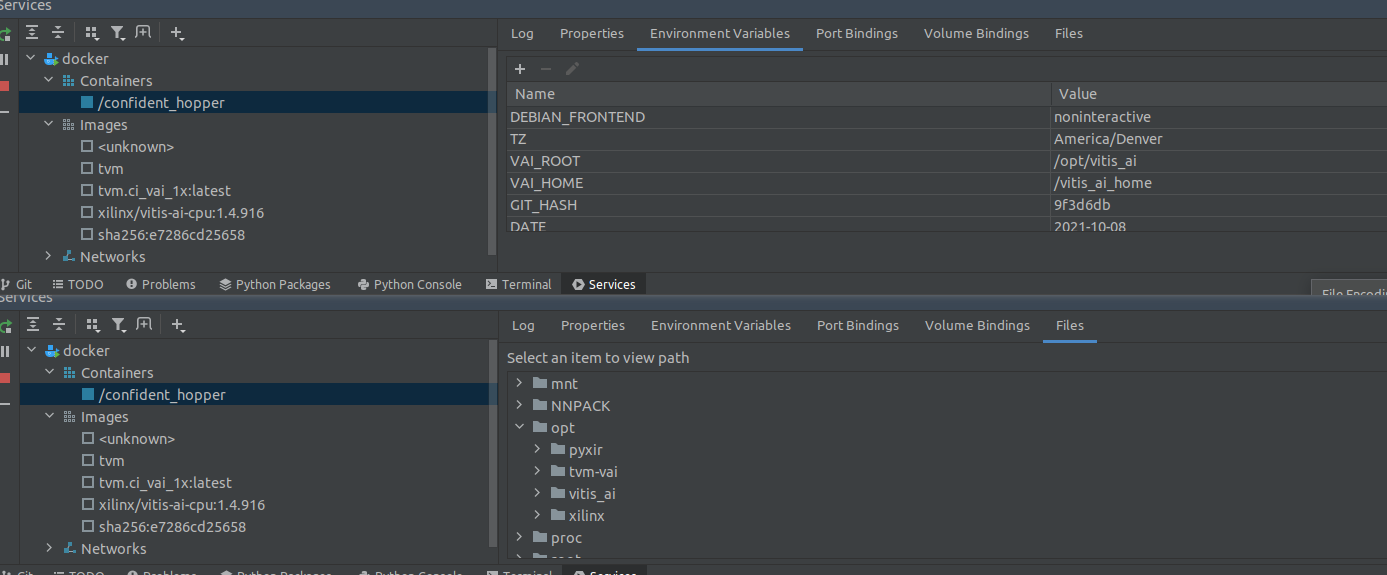
在安装TVM的过程中,会把tvm-vai的路径写入环境变量(容器内),在此处获取到。相关文件比如/opt/tvm-vai相关文件都是容器内的,不在宿主环境。
FILE_DIR = os.path.dirname(os.path.abspath(__file__))
# 使用 os.getenv() 函数获取环境变量
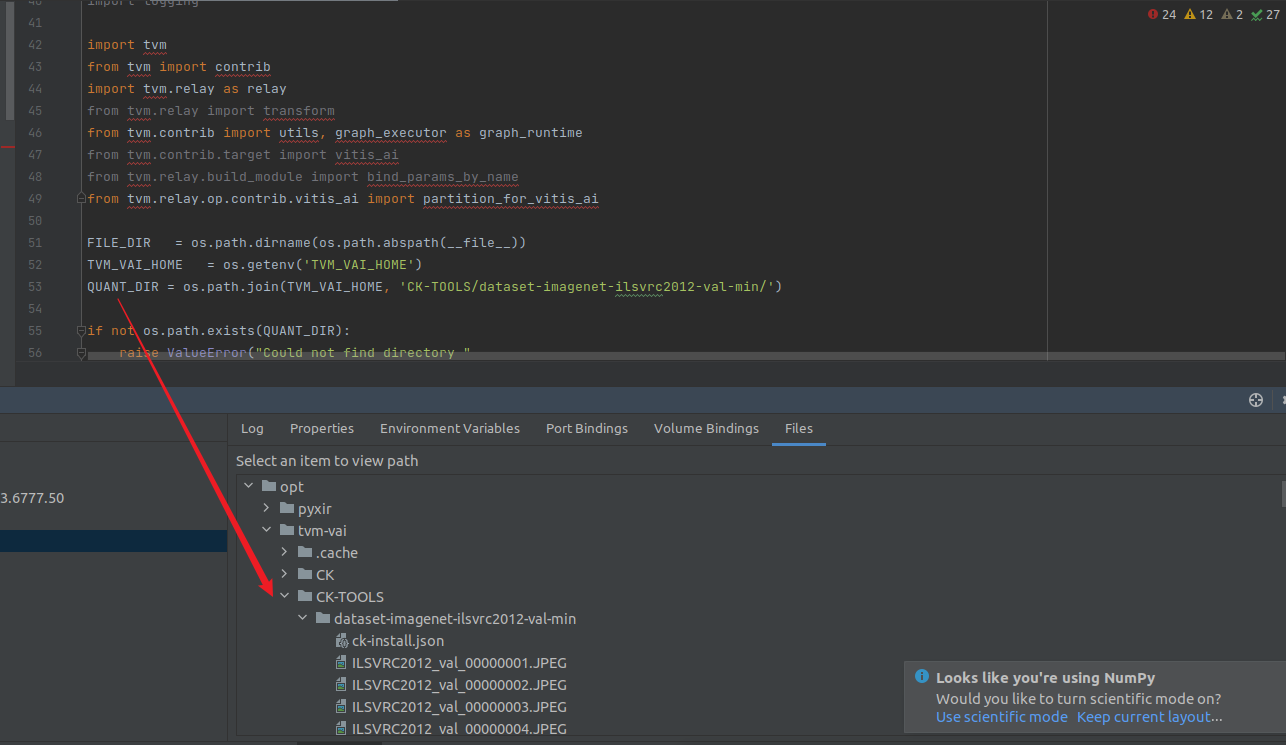
TVM_VAI_HOME = os.getenv('TVM_VAI_HOME')
QUANT_DIR = os.path.join(TVM_VAI_HOME, 'CK-TOOLS/dataset-imagenet-ilsvrc2012-val-min/')
if not os.path.exists(QUANT_DIR):
raise ValueError("Could not find directory "
"~/CK-TOOLS/dataset-imagenet-ilsvrc2012-val-min/."
" Please install using following commands before"
" running this example: \n"
" $ python3 -m ck pull repo:ck-env\n"
" $ python3 -m ck install package:imagenet-2012-val-min\n"
" $ cp -r $HOME/CK-TOOLS $TVM_VAI_HOME")
3. 下载模型
######################################################################
# Download Resnet18 model from Gluon Model Zoo
# ---------------------------------------------
# In this section, we download a pretrained imagenet model and classify an image.
###############################################################################
from tvm.contrib.download import download_testdata
from mxnet.gluon.model_zoo.vision import get_model
from PIL import Image
#from matplotlib import pyplot as plt
# 在线下载模型,存储至block
# mxnet下api可参考:https://mxnet.apache.org/versions/1.7.0/api/python/docs/api/gluon/model_zoo/index.html#mxnet.gluon.model_zoo.vision.get_model
block = get_model('resnet18_v1', pretrained=True)
# 这个网址是一张猫的图片,不科学上网可能会获取超时,可以改成下面的
# img_url = 'https://github.com/dmlc/mxnet.js/blob/master/data/cat.png?raw=true'
img_url = 'https://s1.ax1x.com/2022/03/15/bvB7Ct.png'
img_name = 'cat.png'
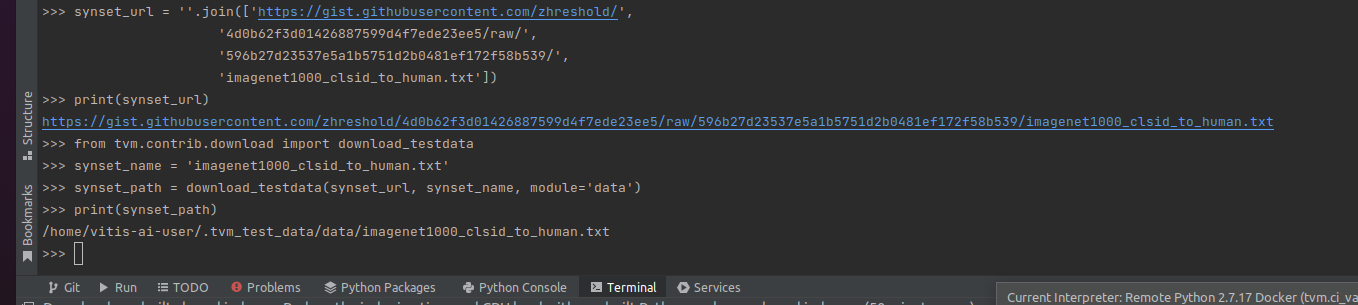
synset_url = ''.join(['https://gist.githubusercontent.com/zhreshold/',
'4d0b62f3d01426887599d4f7ede23ee5/raw/',
'596b27d23537e5a1b5751d2b0481ef172f58b539/',
'imagenet1000_clsid_to_human.txt'])
synset_name = 'imagenet1000_clsid_to_human.txt'
# 注意这个download_testdata函数默认是不重写的,会一直使用最初的图片
img_path = download_testdata(img_url, 'cat.png', module='data')
synset_path = download_testdata(synset_url, synset_name, module='data')
with open(synset_path) as f:
synset = eval(f.read())
def transform_image(image):
image = np.array(image) - np.array([123., 117., 104.])
image /= np.array([58.395, 57.12, 57.375])
image = image.transpose((2, 0, 1))
image = image[np.newaxis, :]
return image
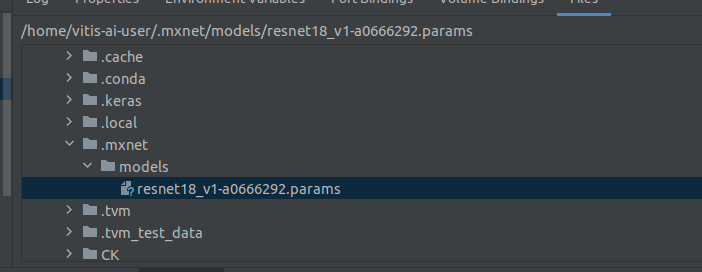
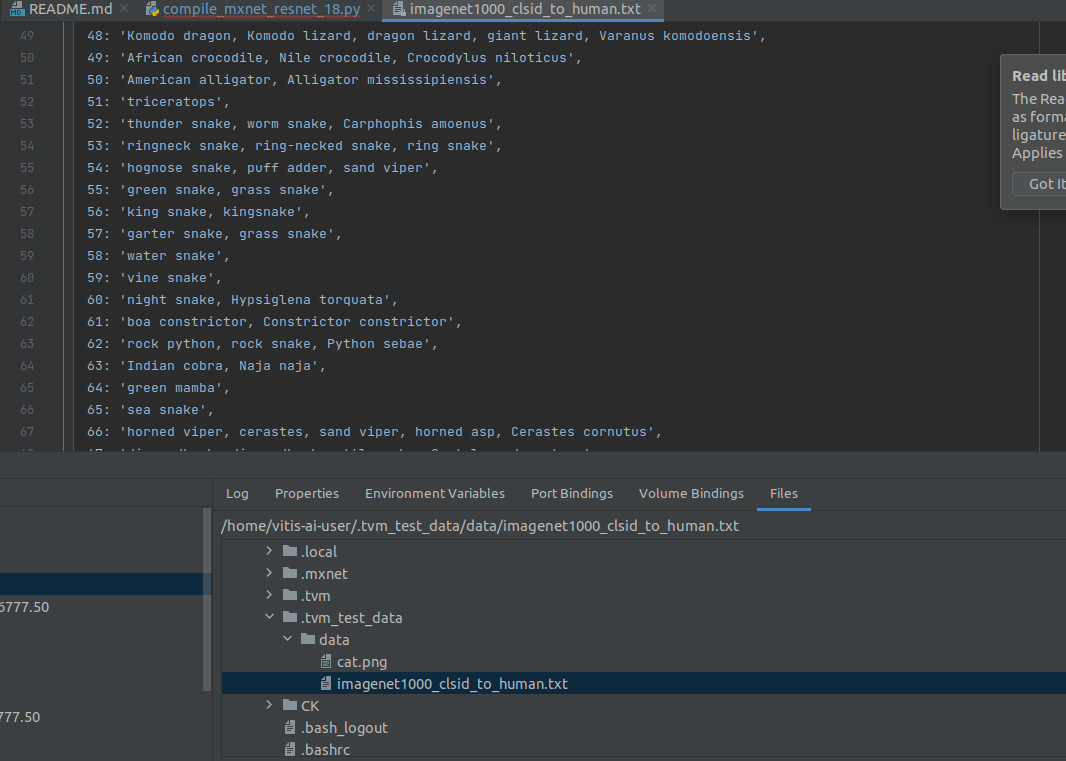
下载下来的模型参数保存至如图位置,赋值给block
下载下来的图片以及txt保存至如图位置
内容如下
4. 模型设置
###############################################################################
# MODEL SETTINGS
#
# Parameter settings for compiling a model using tvm-vai flow
# quant_dir      : path to images for quantization
# dpu_target         : hardware accelerator to run the compiled model
#                      options: 'DPUCADF8H',  'DPUCZDX8G-zcu104', 'DPUCZDX8G-zcu102'
# tvm_target     :
# lib_kwargs     :

###############################################################################

# 检查 python3 compile_mxnet_resnet_18.py "DPUCZDX8G-zcu102" 这句命令是否带参数
if len(sys.argv) < 2:
    raise ValueError("No DPU target specified. Please run with 'python3 compile_mxnet_resnet_18.py `DPU_TARGET`'"\
                     " DPU_TARGET options: 'DPUCADF8H', 'DPUCAHX8H-u50lv', 'DPUCAHX8H-u50lv_dwc', 'DPUCAHX8H-u55c_dwc', 'DPUCZDX8G-zcu104', 'DPUCZDX8G-zcu102'")

input_name  = 'data'
# 原图(cat)shape是256*256
# imagenet的图片是96x96
# input_shape是模型输入的shape
# 测试图片经过预处理之后会转成这个shape
input_shape = (1,3,224,224)
shape_dict  = {input_name:input_shape}
dpu_target  = str(sys.argv[1])
tvm_target  = 'llvm'
lib_kwargs  = {}
5. 输入预处理
###############################################################################
# INPUTS FUNC
#
# Define and inputs function which takes in an iterator value and returns a
# dictionary mapping from input name to array containing dataset inputs. Note
# that the input function should always return image data in NCHW layout as
# all models are converted to NCHW layout internally for Vitis-AI compilation.
#
# This is necessary for quantizating the model for acceleration using Vitis-AI.
###############################################################################

def inputs_func(img_files: List[str]):
    inputs = []
    for img_path in img_files:
        img = Image.open(img_path)
        img = img.convert('RGB')
        img = img.resize(input_shape[2:])

        inputs.append(transform_image(img))
    return inputs
6. Partition and build the Model
###############################################################################
# PARTITION & BUILD
#
# Use TVM Module pass to annotate and partition Relay graph for Vitis-AI acceleration. Targets can be 'DPUCADF8H', 'DPUCZDX8G-zcu104', 'DPUCZDX8G-zcu102'
# Afterwards build graph using standard TVM flow.
##############################################################################

# 利用中继(relay)api加载模型
mod, params = relay.frontend.from_mxnet(block, shape_dict)
# 得到(vitis_ai.rtmod)?大概?在python命令行中复现到这一句时报错
# invalid pointer
mod = partition_for_vitis_ai(mod, params, dpu=dpu_target)

export_rt_mod_file = os.path.join(os.getcwd(), 'vitis_ai.rtmod')
build_options = {
    'dpu': dpu_target,
    'export_runtime_module': export_rt_mod_file
}
# The partitioned model is passed to the TVM compiler to generate the runtime libraries for the TVM Runtime.
# 为目标编译运行时库
with tvm.transform.PassContext(opt_level=3, config={'relay.ext.vitis_ai.options': build_options}):
	lib = relay.build(mod, tvm_target, params=params)
7. 对模型量化
这一部分,不是很理解,所产生的quant_images在这一部分最后一步输入给了InferenceSession,但是对InferenceSession在下一部分的导出中没有起到作用,然后在最后的最后,把这个InferenceSession给删了。但是尝试将这一段以及最后一句del InferenceSession注释之后能产生.so文件(大小和之前不同),但是上板子运行调用报错。
这一部分第一句InferenceSession = graph_runtime.GraphModule(lib"default"),即是加载模型到InferenceSession.然后最后一步InferenceSession.run(),即是对模型进行量化。这里lib也是由上一步最后一句由relay.build产生。
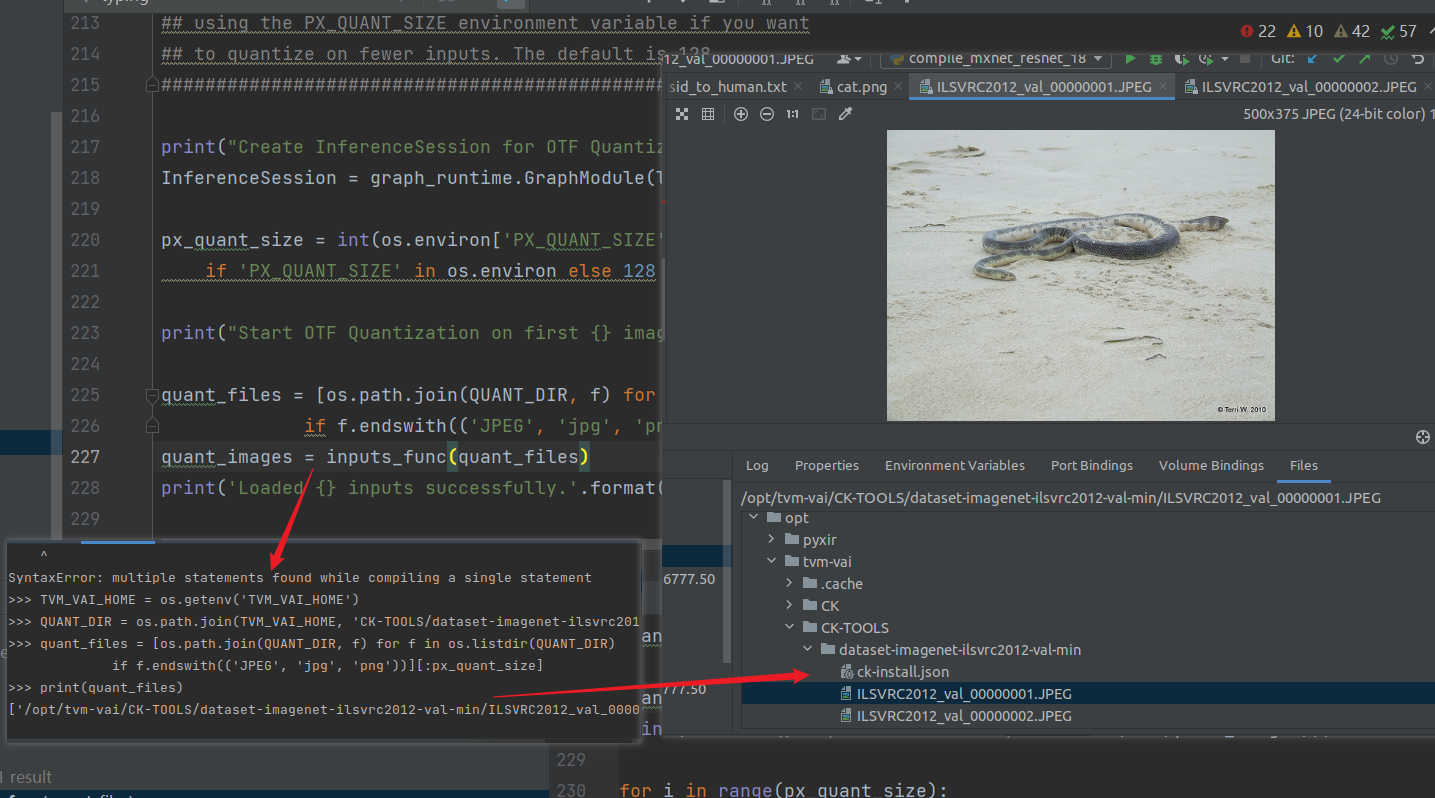
下载下面是待量化的图片的位置
############################################################
## Quantization using first N inputs
##
## Usually, to be able to accelerate inference of Neural
## Network models with Vitis-AI DPU accelerators, those models
## need to quantized upfront. In the TVM Vitis AI
## flow we make use of On-The-Fly (OTF) Quantization
## to remove this additional preprocessing step. In this flow,
## one doesn't need to quantize his/her model upfront but can
## make use of the typical inference execution calls
## (InferenceSession.run) to quantize the model on-the-fly
## using the first N inputs. This will set up and calibrate
## the Vitis-AI DPU and from that point onwards inference
## will be accelerated for all next inputs.
## Set the number of inputs used for quantization to e.g. 8
## using the PX_QUANT_SIZE environment variable if you want
## to quantize on fewer inputs. The default is 128.
############################################################

print("Create InferenceSession for OTF Quantization")
# 详见:https://github.com/apache/tvm/blob/main/python/tvm/contrib/graph_executor.py line:114
InferenceSession = graph_runtime.GraphModule(lib["default"](tvm.cpu()))

px_quant_size = int(os.environ['PX_QUANT_SIZE']) \
    if 'PX_QUANT_SIZE' in os.environ else 128

print("Start OTF Quantization on first {} images".format(px_quant_size))

# 这里只取了前128张图片,根据上面注释的说法,相当于 first N inputs
# 之后的输入也会自动加速
quant_files = [os.path.join(QUANT_DIR, f) for f in os.listdir(QUANT_DIR)
             if f.endswith(('JPEG', 'jpg', 'png'))][:px_quant_size]
#
quant_images = inputs_func(quant_files)
print('Loaded {} inputs successfully.'.format(len(quant_images)))

for i in range(px_quant_size):
    InferenceSession.set_input(input_name, quant_images[i])
    # print("running")
    # 执行量化,过程耗时耗内存
    InferenceSession.run()

print("Finished OTF Quantization")
下图是整个inputs_func函数的功能(以第一张图片为例),注意此部分代码块不是原脚本中顺序,为了方便理解
# 获取原始图片
quant_images = inputs_func(quant_files) ====>进入inputs_func():

def inputs_func(img_files: List[str]):
    inputs = []
    for img_path in img_files:
        # 以第一个图片为例 size(500, 375);title(0, 0, 500, 375);model = 'RGB'
        img = Image.open(img_path)
        img = img.convert('RGB')
        # <PIL.Image.Image image mode=RGB size=224x224 at 0x1FEF70F0D68>
        img = img.resize(input_shape[2:])

        inputs.append(transform_image(img))     ====>进入transform_image()):
    return inputs

def transform_image(image):
    # image : ndarray:(224, 224, 3) [[[ 54.  70.  85.],  [ 56.  72.  87.],  [ 58.  74.  89.],  ...,
    # size : 150528 = 224*224*3
    image = np.array(image) - np.array([123., 117., 104.])
    # image : ndarray:(224, 224, 3) [[[0.92473671 1.2254902  1.48148148],  [0.95898621 1.2605042  1.51633987],  [0.99323572 1.29551821 1.55119826],  ...,
    image /= np.array([58.395, 57.12, 57.375])
    # image : ndarray:(3, 224, 224) [[[0.92473671 0.95898621 0.99323572 ... 1.13023375 1.09598425 1.06173474],  [0.95898621 0.97611097 0.97611097 ...
    image = image.transpose((2, 0, 1))
    # image : ndarray:(1, 3, 224, 224) [[[[0.92473671 0.95898621 0.99323572 ... 1.13023375 1.09598425 1.06173474],  [0.95898621 0.97611097 0.97611097 ...
    image = image[np.newaxis, :]
    return image
8. 导出库
对于DPUZDX8G目标板需要根据aarch64进行rebuild
#########################################################
# Export compiled model for execution #
#########################################################

if dpu_target.startswith('DPUCZDX8G'):
    # Export runtime module
    temp = utils.tempdir()
    lib.export_library(temp.relpath("tvm_lib.so"))

    # Build and export lib for aarch64 target
    tvm_target = tvm.target.arm_cpu('ultra96')
    lib_kwargs = {
        'fcompile': contrib.cc.create_shared,
        'cc': "/usr/aarch64-linux-gnu/bin/ld"
    }

    build_options = {
        'load_runtime_module': export_rt_mod_file
    }
    with tvm.transform.PassContext(opt_level=3, config={'relay.ext.vitis_ai.options': build_options}):
        lib_dpuczdx8g = relay.build(mod, tvm_target, params=params)

    lib_dpuczdx8g.export_library('tvm_dpu_cpu.so', **lib_kwargs)

else:
    lib.export_library('tvm_dpu_cpu.so')

print("Finished storing compiled model as tvm_dpu_cpu.so")
del InferenceSession